Network-wide ad blocking using AdGuard Home deployed as a VM on ESXi. Blocks ads, trackers, and malicious domains at the DNS level — before they reach any device on the network.
🖥️ Environment
- Hypervisor: VMware ESXi
- VM OS: Ubuntu Server 24.04 LTS
- VM Specs: 3 vCPU, 4 GB RAM, 60GB disk
- AdGuard Home Version: Latest stable
🚀 Step 1: Create the VM on ESXi
Created a new VM in the ESXi web UI with the following settings:
- Guest OS: Ubuntu Linux (64-bit)
- 3 vCPU, 4 GB RAM, 60GB disk thin-provisioned disk
- Network adapter on the LAN portgroup
Mounted the Ubuntu Server ISO and completed a minimal install — no GUI, OpenSSH enabled during setup.
📦 Step 2: Install AdGuard Home
SSH into the VM, then download and run the installer:
curl -s -S -L https://raw.githubusercontent.com/AdguardTeam/AdGuardHome/master/scripts/install.sh | sh -s -- -v
AdGuard Home installs to /opt/AdGuardHome/ and registers itself as a systemd service automatically.
Verify it’s running:
sudo systemctl status AdGuardHome
🌐 Step 3: Initial Web Setup
Access the setup wizard from a browser on the same network:
http://<VM-IP>:3000
During setup:
- Set the DNS server port to
53 - Set the web interface port to
80(or3000to keep default) - Create an admin username and password
After setup, the dashboard is accessible at:
http://<VM-IP>
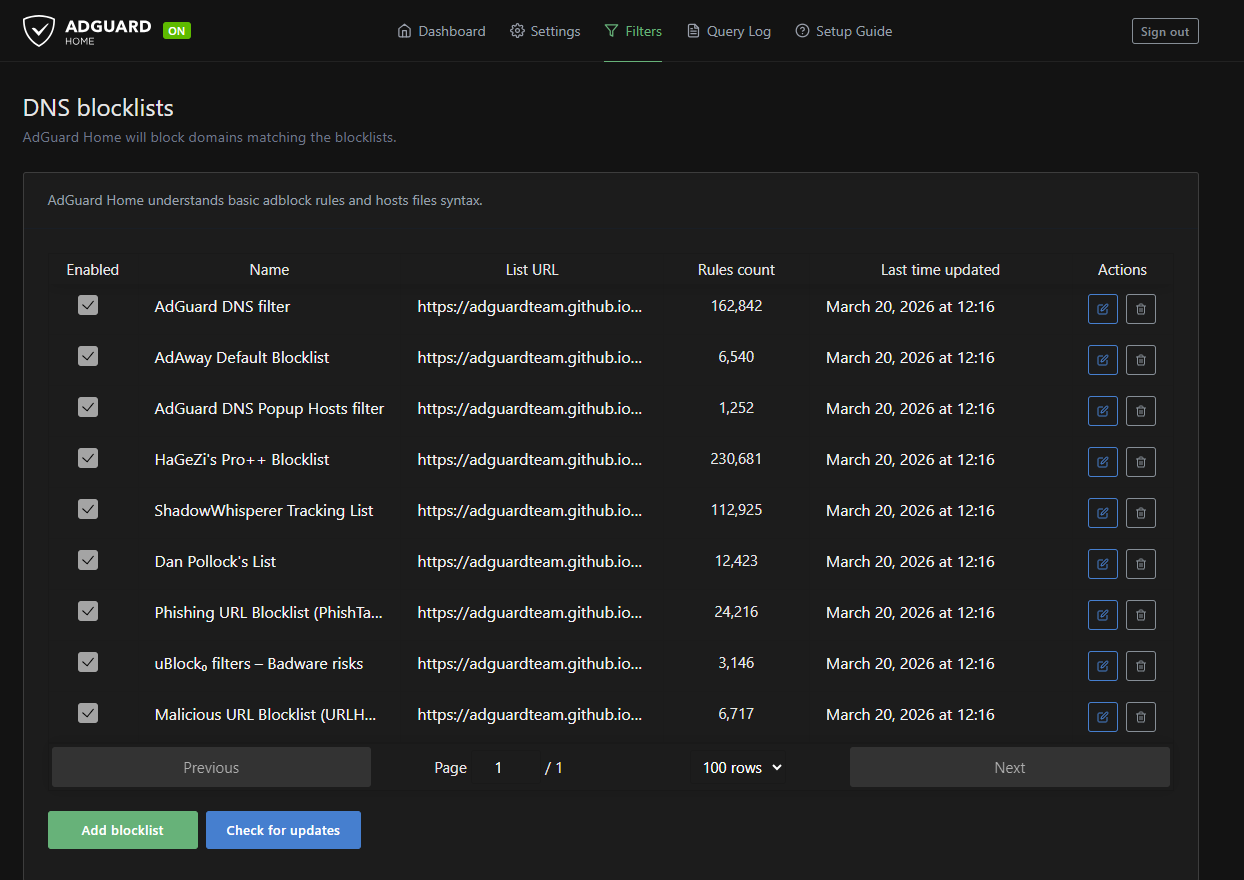
🛡️ Step 4: Configure Blocklists
Navigate to Filters → DNS Blocklists → Add blocklist.
Blocklists added:
| List | Purpose |
|---|---|
| AdGuard DNS Filter | General ads and trackers |
| AdAway Default Blocklist | Mobile ads |
| Steven Black Unified Hosts | Ads, malware, fakenews |
| OISD Full | Comprehensive all-in-one |
After adding, click Update to sync all lists.
!
🔁 Step 5: Configure Upstream DNS
Navigate to Settings → DNS Settings → Upstream DNS servers.
Set upstream resolvers:
https://dns10.quad9.net/dns-query
https://cloudflare-dns.com/dns-query
1.1.1.1
8.8.8.8
Enable Parallel requests for faster resolution.
🏠 Step 6: Network-Wide Setup (Router DNS)
To apply AdGuard Home to all devices without touching each one individually, set the VM’s IP as the primary DNS server on the router/gateway.
On Home Router:
Services → DHCP Server → DNS Servers → <VM-IP>
On a home router:
- LAN Settings → DNS Server 1 →
<VM-IP> - DNS Server 2 →
1.1.1.1(fallback)
All DHCP clients will now route DNS through AdGuard Home automatically.
!
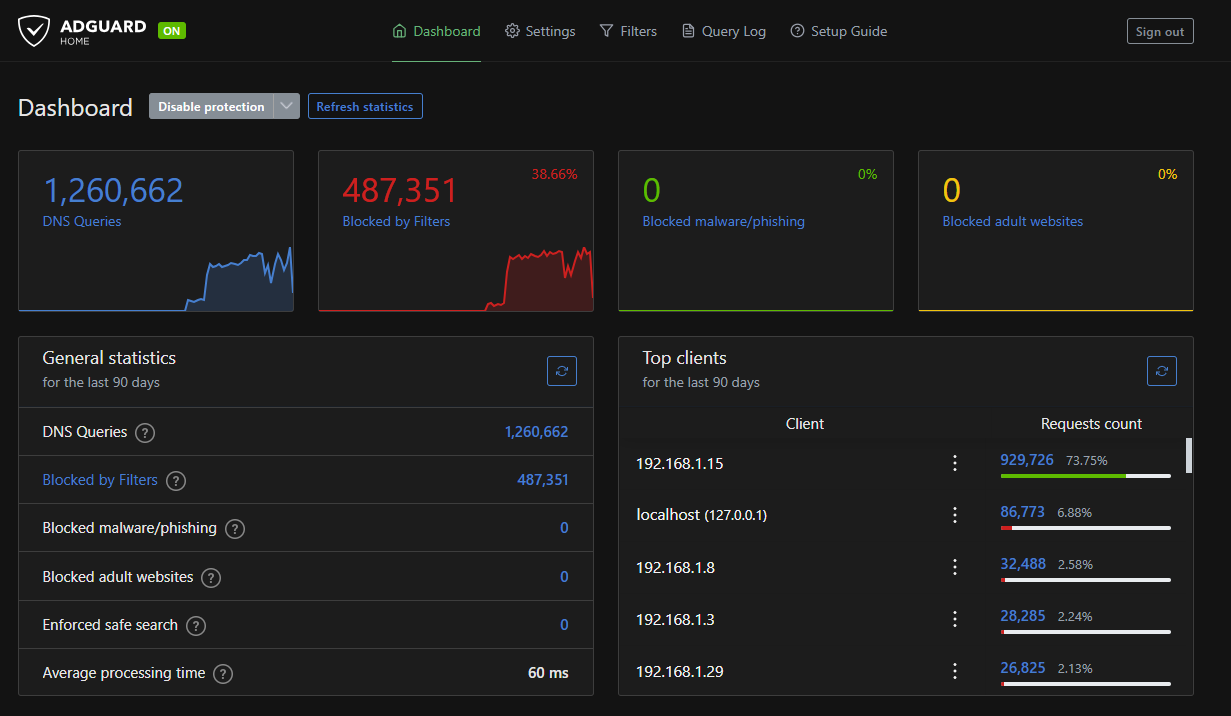
✅ Verify It’s Working
From any device on the network, run:
nslookup doubleclick.net <VM-IP>
A blocked domain should return 0.0.0.0 — confirming AdGuard is intercepting it.
The dashboard will also show live query logs and block statistics.
📌 Notes
- Set the VM to a static IP in ESXi or reserve it via DHCP on the router
- Enable DHCP leases in AdGuard Home (Settings → DHCP) if you want it to handle DHCP as well — not required for DNS-only setup
- AdGuard Home auto-updates can be triggered from the dashboard under Settings → Updates